All future blog posts are at the Rolling Joy tab at CorbettOToole dot com

Sunday, July 17, 2022
Blog moved to CorbettOToole.com

Thursday, December 2, 2021
Rolling Joy One Year Anniversary
ROLLING JOY 2.0
ONE YEAR ANNIVERSARY!
Wow!
Year in review: Parked the entire year in Chiefland, Florida. A small rural town where the only delivery services are Walmart and one pizza shop. And no one wears masks because, according to the locals, “the government is trying to control us and make us afraid with all that made up stuff about Covid.”
So I spent the year staying far from people except for Eliana, a great college queer who assisted me once a week.
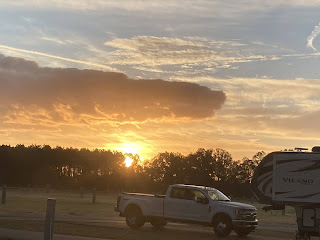 |
| Sunrise at Campground #1 |
Both my campgrounds had great views. The first one was on 40 flat acres so the sunrises and sunsets were amazing. There was always a breeze even though there was no shade. Lots of birds flying overhead, especially raptors.
The second campground, a small Skoolie compound, is surrounded by multiple varieties of thin oak trees.
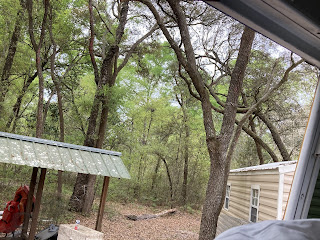 |
| Canopy of oak trees surround bus and sheds. |
Here the wildlife is up-close. A tree next to the bus has a knot about 10 feeet high that houses squirrel families. The squirrels here are skinny compared to city ones. Mostly because they run (never walk) all the time and jump long distances between trees. Quite a show!
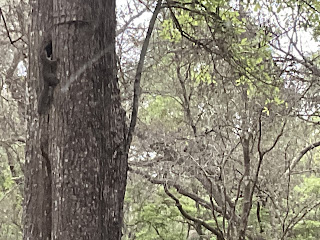 |
| Squirrel climbing into home aka knot hole in the oak tree |
One of the folks here keeps a bird list. I hear lots of them but mostly only see the giant (to me) red cardinals. Don’t know why I thought cardinals were the size of finches but I was wrong. How does a bright red bird blend in so easily to the tress?
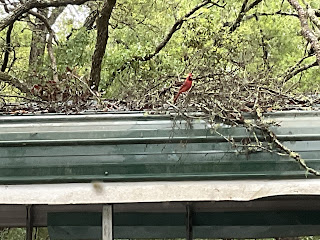 |
| Red cardinal hidden among a branch lying on a metal roofed shed |
This part of Florida is full of egrets, herons and cranes. The small ranches of 20 cattle have egrets standing beside the cattle making a striking dark/light contrast of interdependent species. Seeing a flock of cranes flying overhead in formation took my breath away the first time I saw it.
My days on the bus are easily filled with Zoom meetings, FaceTime chats and projects including returning to writing my first novel. This might not sound like much but as I approach my 2 year anniversary of having Covid, the long term effects remain. I have significant fatigue often accompanied by brain fog.
The upside is that my previously overworked brain is now calmer and more easily entertained.
BIG NEWS - DOWNSIZING (again)
I am selling the bus. After living in it I realized it’s too big for me and I don’t like driving it. All my planning created a bus that is great for a wheelchair but not for MY body in a wheelchair. So it’s time for a change.
BUS SALE information: https://www.rvtrader.com/listing/2001-Blue-Bird-SCHOOL-BUS-5018425614
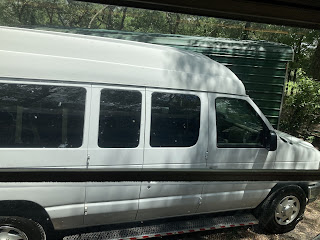 |
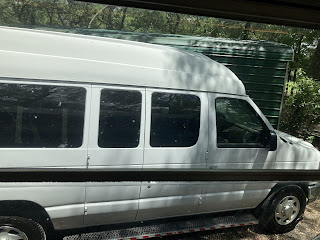
| White high top E-350 van. |
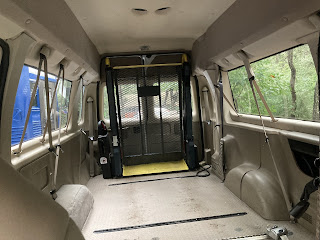 |
| Van interior facing rear |
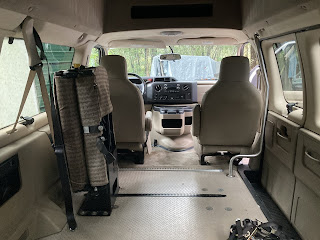 |
| Van interior facing front |
I bought a Ford Econoline E-350 van with a raised roof. It’s got low mileage especially for 2011, runs great and will be easy to convert for living.
My current plan is to do the basics (bed, toilet, power, etc.) so I can go to Quartzite, Arizona as soon as possible. Quartzite is where the nomads (people living full time on the road) go for the winter.
Once in Quartzite I will hook up with the Rubber Tramp Rendezvous / Homes on Wheels Alliance folks and add solar and plumbing to the van.
I’m really looking forward to being mobile and to have a more nimble vehicle for traveling and camping.
THANK YOU for all the support that makes these journeys possible.
Tuesday, February 2, 2021
Newbie Surprises
These first few months on the bus flew by. I kept intending to write a blog post to keep you all updated but there were so many surprises
There’s an expression in many cultures but I’ve heard it as “people plan and God laughs.” I’m one of those people that thinks that because I have a plan that’s what will actually happen. Of course my carefully made plan never happens. So instead of saying I encountered some problems so I’ve decided to tell you that I encountered some surprises.
THE GLORIOUS BED
One of my biggest indulgences for this adventure is my first brand new mattress. With new pillows and comforters from IKEA I am supremely comfortable and warm every night.
OH, THE VIEWS
One of the things I love most about school buses is the abundance of windows. Here are a few morning views.


I’m in a flat 20 acre field that’s surrounded by mature trees at the edge. I ling passenger side faces south and I watch the sun rise from my left and set on my right. Every day is a beautiful visual adventure.
SURPRISE!
The number of things that have broken surprised even pessimistic me. A few of the things that broke: chair, wheelchair, toilet, hot water heater. With each problem my health got worse. So having a fabulous bed is wonderful since I’m spending most of my time in it.
RAINBOWS
I made some minor improvements this week that are providing visual joy and practical storage. The visual joy comes from a window film that makes rainbow patterns inside the bus while providing visual protection from people walking by.
 |
| Translucent laser cut window film in the lower half of the bus window. Beyond the window other RVs and a blue sky are visible. |
 |
| The window film has laser cuts that make beautiful rainbow designs on the inside of the bus |
I added shelves above the windows over the bed and kitchen
 |
| 12 inch deep Wood shelf supported by L shaped brackets above the bus windows |
DOORS
The two large bus doors, the wheelchair door on the side of the bus and the emergency escape door on the back of the bus are easy to open from outside but were impossible to open from the inside. We created a system with just a simple piece of piping that pivots up and down to get the wheelchair door open. A rope secures it so that it cannot open too far.
 |
| A piece of galvanized pipe extends from inside the bus and slides onto open hooks on the bus side door. Yellow para cord rope prevents the door from flying too far open. |
HANGING HANDCYCLE
Another challenge with getting the Firefly hand cycle, which weighs 30 pounds, in and out of the bus. Up until now I’ve been lifting it from the 4 foot bottom of the bus. But we found a place to mount it inside the front door with a pulley. The system is surprisingly easy and effective.
 |
| The fire fly hand cycle is held up by yellow para cord rope that goes through a pulley at the top of the door frame and comes down to a cleat inside the door. UM HORIZONTAL LIFE I’m spending my days more horizontal than I planned. I learned there’s a lot I can do from bed including learning to use Apple‘s new voice control system, which although far inferior to Dragon dictate, is far better than Apple‘s typical dictation system. I’m enjoying short phone calls and FaceTime with friends, doing a little bit of writing every week mostly on my Library novel, and as always doing more reading and enjoying retirement. . |
Tuesday, December 15, 2020
Crossing the US
On November 9th I finally got on the road. David drove me from West Coast to East Coast in six days.
 |
| Dry scrub landscape NV |
 |
| Snow on the ground near Flagstaff AZ |
One of my favorite photos is in Texas. A huge building with a large sign “Shelton Fireworks”.

Over the wide entrance doors is a huge banner “No Smoking”. The need for the big banner made me ponder if the customers understand what they are buying and how they work.
I was surprised at my internal joy when I first saw the Gulf of Mexico in Mobile, Alabama.
 |
| Green long grasses form the Gulf shoreline. Alabama |
 |
| A lone sailboat anchored in the Gulf. Alabama |
The water levels in the Georgia landscape made a dance with the low lying around. One minute I’d see water on the surface in a field and 100 yards later it would only be ground. Up and down the dance went all the way across the state.
 |
| Wooded area Georgia |
Our destination is in North Central Florida. The land is flat, having been cleared for crops previously, and the 20+ acres are surrounded by tall mature trees. The sunrises are amazing.
 |
| Stunning orange yellow sky sunrise behind tall straight mature trees |
Monday, November 2, 2020
Blue Outside, Crane inside
Three HUGE changes to the bus.
The outside is BLUE!!!! The inside is white. The bathtub crane and hoist are installed.
 | |
| Rolling Joy bus with new paint. Bus top is bright white and the body is marine blue. A black band caps the bottom edge. |
She looks great! I love the color.
When you paint a school bus you have 2 choices - tractor paint or rust-prevention paint. Tractor paint lasts longer and was designed for metal. But the choices are very limited. It's colors like Caterpillar Yellow and John Deere green.
 | ||||
| 18 tractor paint colors |
Luckily they make one blue paint - Ford Blue (aka New Ford/Holland Blue) which is now covering Rolling Joy. I love being in or near water. So riding around in a blue bus really suits me.
I want to preserve the school bus history of Rolling Joy so I left a tiny area on the front original.
 |
| Front of the bus shows a rectangle of the original school bus yellow color with the words "Blue Bird" in silver surrounded by blue paint. |
I painted the inside of the bus a bright white but left the ceiling the original tawny metal. I will be adding decorations - particularly on the outside of the tub. Here's a first look at the new interior colors amid the mess of ongoing renovations.
 |
| View of the bus from the front looking to the back. The wood is all painted white and gleams off the off-white metal ceiling. |
The amazing Samantha the Welder took on the complicated project of modifying an existing crane. She had to find pipe that is not made in the U.S. and then create a taller crane. She added holes for locking the crane so it doesn't spin around. She replaced the hand-crank hoist with an electric one - and built a new base for the hoist and a new roller end to thread the cable. You can find her on Instagram.
 |
| The vertical column of the crane is bolted to the floor between the tub and kitchen counter. The horizontal arm is topped by an electric hoist with a steel cable and closing clip. |
Just have to get it all hooked up to the electrical system so we can test it. I can't wait to have my first bath in over a decade. It's getting closer.
Wednesday, October 21, 2020
First Rolling Joy Bus walk thru
When I bought the school bus it was a dirty empty shell. Previous owners removed the bench seats and floor rivets. They left bits of wood and supplies.
Then the conversion folks installed insulation, ceiling fans and lots of built-ins. Access: I added a voiceover description of what is shown in the bus. There are also captions. Hit the 'autocaption' option to see the captions (I edited them). If the video does not run for you, then here's the Youtube link
We're almost done painting. Still to be done: Adapt and weld the pickup truck crane and add the electric hoist to get me out of the tub and off the floor. Figure out what to do with the driver's side rear wheel well where the rust is barely holding the wheel rubber bumper on. Create storage. And oh so much more.
Saturday, October 3, 2020
Making the Bed from one side only
For some of us making the bed, specifically changing the sheets is impossible. I can pull everything off the mattress. But I cannot get it back on.
I decided to solve that problem. With the coronavirus, I want to limit my exposure so I don't want people coming into the bus. I'll gladly visit outside at a 6 foot distance.
After a lot of thought and design revisions here is what I plan to change my sheets.
BUILT IN
The design requires eye bolts at regular intervals on 3 sides of the bed (the 4th side is open to me). Since the base of the bed is plywood, I have a solid surface for the long side. On the short sides I don't have access to the base because the mattress is up against the walls so I put the eye bolts just below the height of the mattress.
The other materials are strong thin rope. I am using paracord with different colors on the long and short sides. I placed carabiner's (like the ones you put on your keys but a bit stronger) along the paracord between the eye bolts. I do not lock them in place because I want to be able to move them as needed.


"Short Side Taut" shows the green paracord rope going through the eye bolts on the short end of the bed.
After the paracord rope was threaded through the eye bolts, I added carabiners between each eye bolt. The carabiners are shown as black rectangles.
CHANGING THE SHEETS
In this drawing I am using the long
side and the left short side to hold the blue sheet. This means that my head is going to lay on the right short
side. On a skoolie (converted school bus) it's necessary to be able to
sleep with my head at either end.
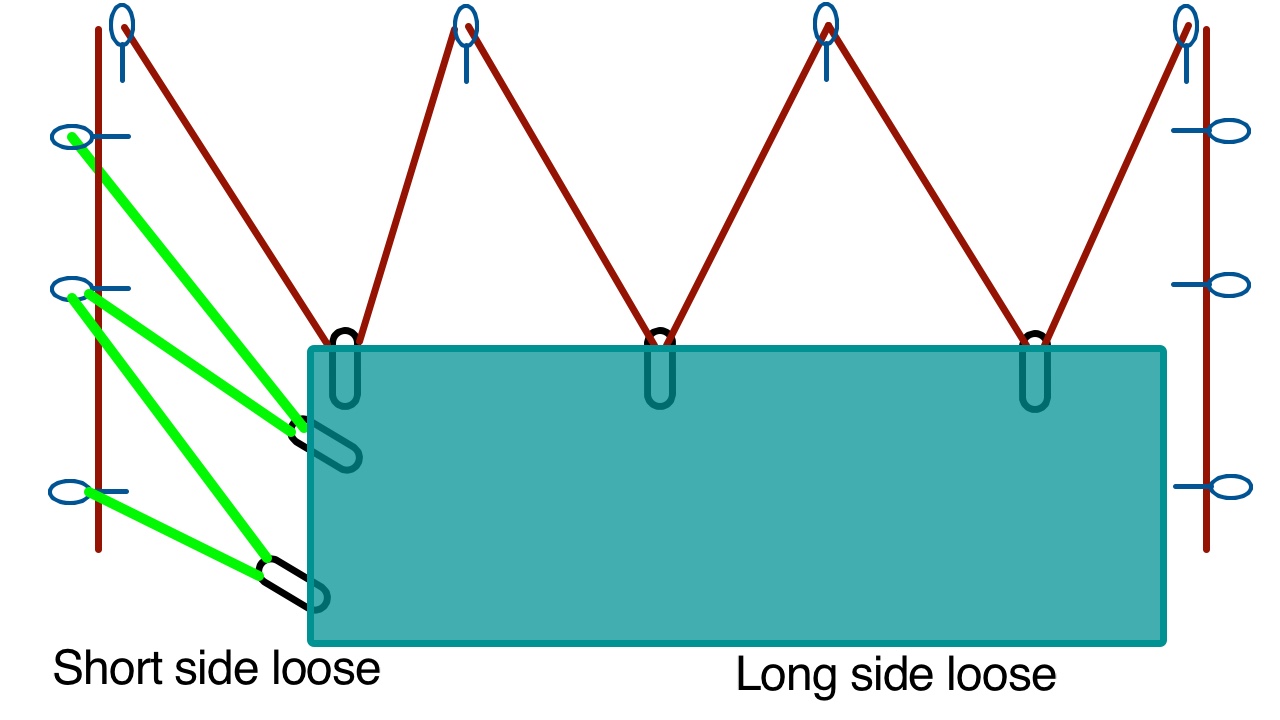
I can make both the long and short sides loose by releasing the tension on them. Then I can pull the sheet all the way across the bed to the open long side.
To prevent ripping the sheets, I bought king size sheets for my queen size bed. Then I folded over the edge on the long side and one short side. I inserted a piece of duck cotton for added strength. Then I sewed button holes where I want the carabiners to be attached.
I decided not to use grommets for 2 reasons. I don't want anything metal near my body when the air is cold. And even though they are small, I didn't want to roll over and have cold metal waking me up. I also didn't want the noise of metal grommets against the metal carabiner.
When I want to put the sheet back in place, I just tighten the paracord -- long side first then the short side.

I plan to use the carabiners to attach the mattress pad, bottom sheet, top sheet and duvet cover. I will use all the carabiners for the mattress pad and bottom sheet but only a few carabiners for the top sheet and, when needed, duvet cover.
Fingers are crossed that this will work as well as I planned.
Friday, October 2, 2020
Access Features part 2 - First Peek
Access Features Part 1 documented the decisions for the lift into the bus and also the kitchen area. Part 2 looks at the Work Table, power outlets, and toilet. There will be a separate post on my mobility equipment, seating, as well as changing the sheets without climbing on the bed.
Access note: I belatedly realized I haven't described the images. Starting with this post (and all other posts will follow) I am adding a detailed caption to each image. Apologies to folks for not doing this sooner.
A quick summary - I am a wheelchair user. I need to do (or know how to direct someone else to do) everything on the bus - from hooking up at campsites to changing the bed by myself. Posting the layout again.
 |
| Bus layout. Top (driver's side): sliding, rotating driver seat; washing machine; deep soaker bath tub; kitchen counter and sink; toilet; bed across the back of the bus. Passenger side: front door, open space; Superarm lift; wheelchair door; long table. |
WORK TABLE / DESK
I plan to do a lot of writing and making art. I want a durable surface with lots of room to spread out a project. I choose a single slab of maple butcher block 8' long and 2' deep as the top of the work table. I find that 2' depth is the right mix for me of work and tabletop storage area.
Inside the bus I get around in an office chair on wheels. It has a smaller footprint than a wheelchair. I designed a table that is an upside down "U". The side supports are solid plywood so they can be used as attachment points to restrain the under-desk storage.
Under both the kitchen and work tables the space is wide open
from side support to side support. This design gives me maximum
flexibility in storage and the easiest options for changing systems as
my needs change. My current plan is to use the 3 gallon and 10 gallon
Rubbermaid totes because they are light to lift, are rubber so no noise
when rolling down the road, and stack easily allowing for many different
configurations.
 | |
| Photo of desk/table |
 | |
| Drawings showing front and side views of one possible under table storage configuration with 5 columns of 3 small storage boxes and 1 column of 2 large storage boxes. Side view shows that the boxes are recessed 6" from the front edge of the table. |
As you can see on the far right side the yellow metal is the cover for the gas tank. The blue electrical outlets show (from top) ceiling light control (so I can turn the lights on/off from bed), two 3 prong plugs and below that two USB plugs. The black circle at the bottom of the right leg is where the heat comes in from the diesel heater.
 | |
| Close up photo of right table support showing (from top) light switch rocker, two 3 prong outlets, two USB outlets and at the bottom the heater vent. |
POWER OUTLETS
I placed power outlets in strategic places throughout the bus. They are under the front edge of the kitchen and desk counters. When they are on walls, they are just below the windows at a height of 24" from the ground.
The under-counter outlets are recessed 4" from the front edge of the counter. This allows the plug to stay tucked inside the profile of the countertop. I didn't want to be hitting a plug because it was sticking out from the edge of the countertop.
A few things have their own power outlets - the washing machine, the Dometic fridge/freezer, the Superarm lift and the driver transfer seat. The electric hoist on the crane will also have a dedicated outlet.
The rest of the outlets have both 3 prong and USB plugs. Having many USB ports means that I don't have to constantly look for USB adapters.
TOILET
** If you talk to RV folks you will hear about toilets. If you don't want the details, skip this section. **
There's
lots to think about in selecting an RV toilet. The biggest one is black
tank or not. A black tank is basically a holding tank where the toilet
empties. In an RV that means you fill it up and you then have to empty
it.
 |
| Photo of the Separett toilet from above. Also visible is the drain pipe for the sink. |
So I started exploring composting toilets. I knew I wanted a urine-diversion option. That means the urine is hooked up to the grey tank (waste water) and mixed with the water runoff from the sink and tub.
The final consideration is what happens to the poop. Some systems incinerate it but that's a huge energy hog and I want to have off-grid, low power options. Other systems require you to crank a handle to mix the poop with another substance (sawdust, coconut coir, etc).
I settled on the Separett toilet because the urine can go into the grey water tank and the poop decomposes slowly into a bag and can be easily emptied.
I had the toilet set 6" away from the wall to give me more space. I also have open space on both sides so that I have multiple options for transfer direction.
Wednesday, September 23, 2020
Access Features Part 1 - First Peek
For the last year I designed (and redesigned) Rolling Joy, my 30' school bus conversion. Sending it to the bus conversion folks meant I had to make some important access decisions from afar. I had to decide on the final layout, what types of systems I needed (solar? propane? shore power?) as well as where to put the electrical outlets and what kinds I needed (3 prong? USB?)
Because I use a wheelchair, I adapt and redesign every place I live. Rolling Joy provided the challenge of having to plan more carefully because in a space that's 25' long and 7.5' wide every decision is critical and in many cases permanent. I can't move the bathtub or toilet or bed later.
In this 2 part blog on Access Features I take you through some of the reasons for the decisions I made.
One of the best pieces of advice I received on doing a custom build: "Figure out what's really important to you and then make those the priorities."
My priorities: a queen size bed with handrails; a series of eye bolts on the bed frame so I can change the bed without climbing on it; a kitchen counter with a built-in sink; a large table with clearance underneath; a soaking bathtub; a washing machine; two ceiling fans; a lift that drops me right next to the bus; a driver's seat on a rail to move back and swivel; under-the-bus locked storage cabinets; and enough solar and batteries to live off-grid for a few weeks at a time.
All of these require careful access considerations. What is the usable height of the bed? of the toilet? Where to put the electrical outlets? the important monitors (for solar/ water/ fuses)? How to get in / out of a deep bathtub? So many questions. So few options.
By and large I made up the solutions based on what I know works for me and what I hope will work in a bus. After 2 years of research I only found a handful of wheelchair users who travel in an RV or skoolie (adapted school bus) independently. Nearly all wheelchair users travel with a nondisabled person. Based on their blogs and articles the nondisabled person does a lot of tasks that I will be doing myself.
In Access Features Part 1 I discuss the lift to get me into the bus and how I designed the kitchen area. Part 2 focuses on the Work Table, Soaking Bath Tub, in-bus lift, and toilet.
Just for easy reference I am putting the layout here along with a front-to-back view of the inside:

ACCESS ESSENTIALS
LIFT
The floor of the bus is nearly 48" above the ground. The bus came with a working industrial Braun lift. The conversion folks removed it (chopped it into pieces) when they laid down the floor (a sad story for another time).
As I evaluated replacements I also looked closely at RV parking spaces in campgrounds. A school bus is 8.5' wide. The parking spaces (i.e. space available for the RV and getting in and out) are usually 10' wide. Just enough room for someone to open the door and step out of the RV. Definitely not made for any kind of platform lift (i.e. a lift where you roll out onto a platform) and there's rarely, if ever, any additional flat space next to the bus in a typical RV campsite.
I assessed if I could make any type of platform lift work. Typical platform lifts require 3-8 feet of drop space. Even if I cut off the lift side wall (a common disability hack), I'd still need 3- 4' because of the way that the lift pulls away from the bus as it drops.
All this led me to look at Superarm lifts. Started by a wheelchair user, the Superarm is the ultimate bad ass lift. You are hanging your body with 1" straps attached to a single horizontal bar.
Yup, all that's between me and a 4 foot drop is 1" straps attached to a horizontal bar.
Take a deep breath because riding this lift feels as scary as the photos show. But I want to be clear, this is a safety-tested lift. I am safe as long as I follow their directions on how to attach the straps to my wheelchair and how to safely operate the lift. Superarms are reliable lifts and the owner (according to website photos) was also a large-bodied person. My fear comes from being a new user and the height I am traveling.
As the photos show I am still in the "I'm know I am going to die" phase of learning to trust the lift. But as I nail it, I will relish the freedom of a lift that positions me right next to the bus.
Here's how it works.
A tall motor mechanism is mounted on the right side of the door opening (right as looking from the outside). It has an "L" shaped metal arm. The long side connects from the motor mechanism. Ths short side has 2 hooks. There is also a wired controller with 2 toggle switches (up/down, in/out).
When I first got the lift, it came with 2 metal rings with two 1" strips of webbing on each ring. The device and straps are rated to safely lift 600 lbs. On each side I take the shorter strap and attach it to my wheelchair handle. The longer strap goes down to my wheelchair base frame. I adjusted them until I was comfortable when the lift rises.
I start by grabbing the controller (which I leave on the bus floor at the door opening when I am outside). I park my wheelchair with big wheels against the bus. The lift arm comes down in front of me. When it reaches the lowest point, I attach the 2 metal rings to the 2 hooks on the metal arm.

Then I lift myself a few inches off the ground. I am checking that the I can be lifted safely while I am still close to the ground. Once assured, then I bring the lift "up" about 2 feet from the ground.

The lift automatically stops when I reach the top of "up". Then I press "in" to pivot the long metal arm so while the short metal arm rotates keeping the hooks in a strong lifting position.

The "in" function is timed to move much more quickly than the "up" function. Once I am inside the bus, I am still a few inches off the floor so I press "down" to bring the wheelchair down to the floor of the bus.

After I am fully down, I disconnect the metal rings from the metal arm and press "out" to position the lift parallel to the door for storage. That keeps the lift out of my way when I am inside the bus.
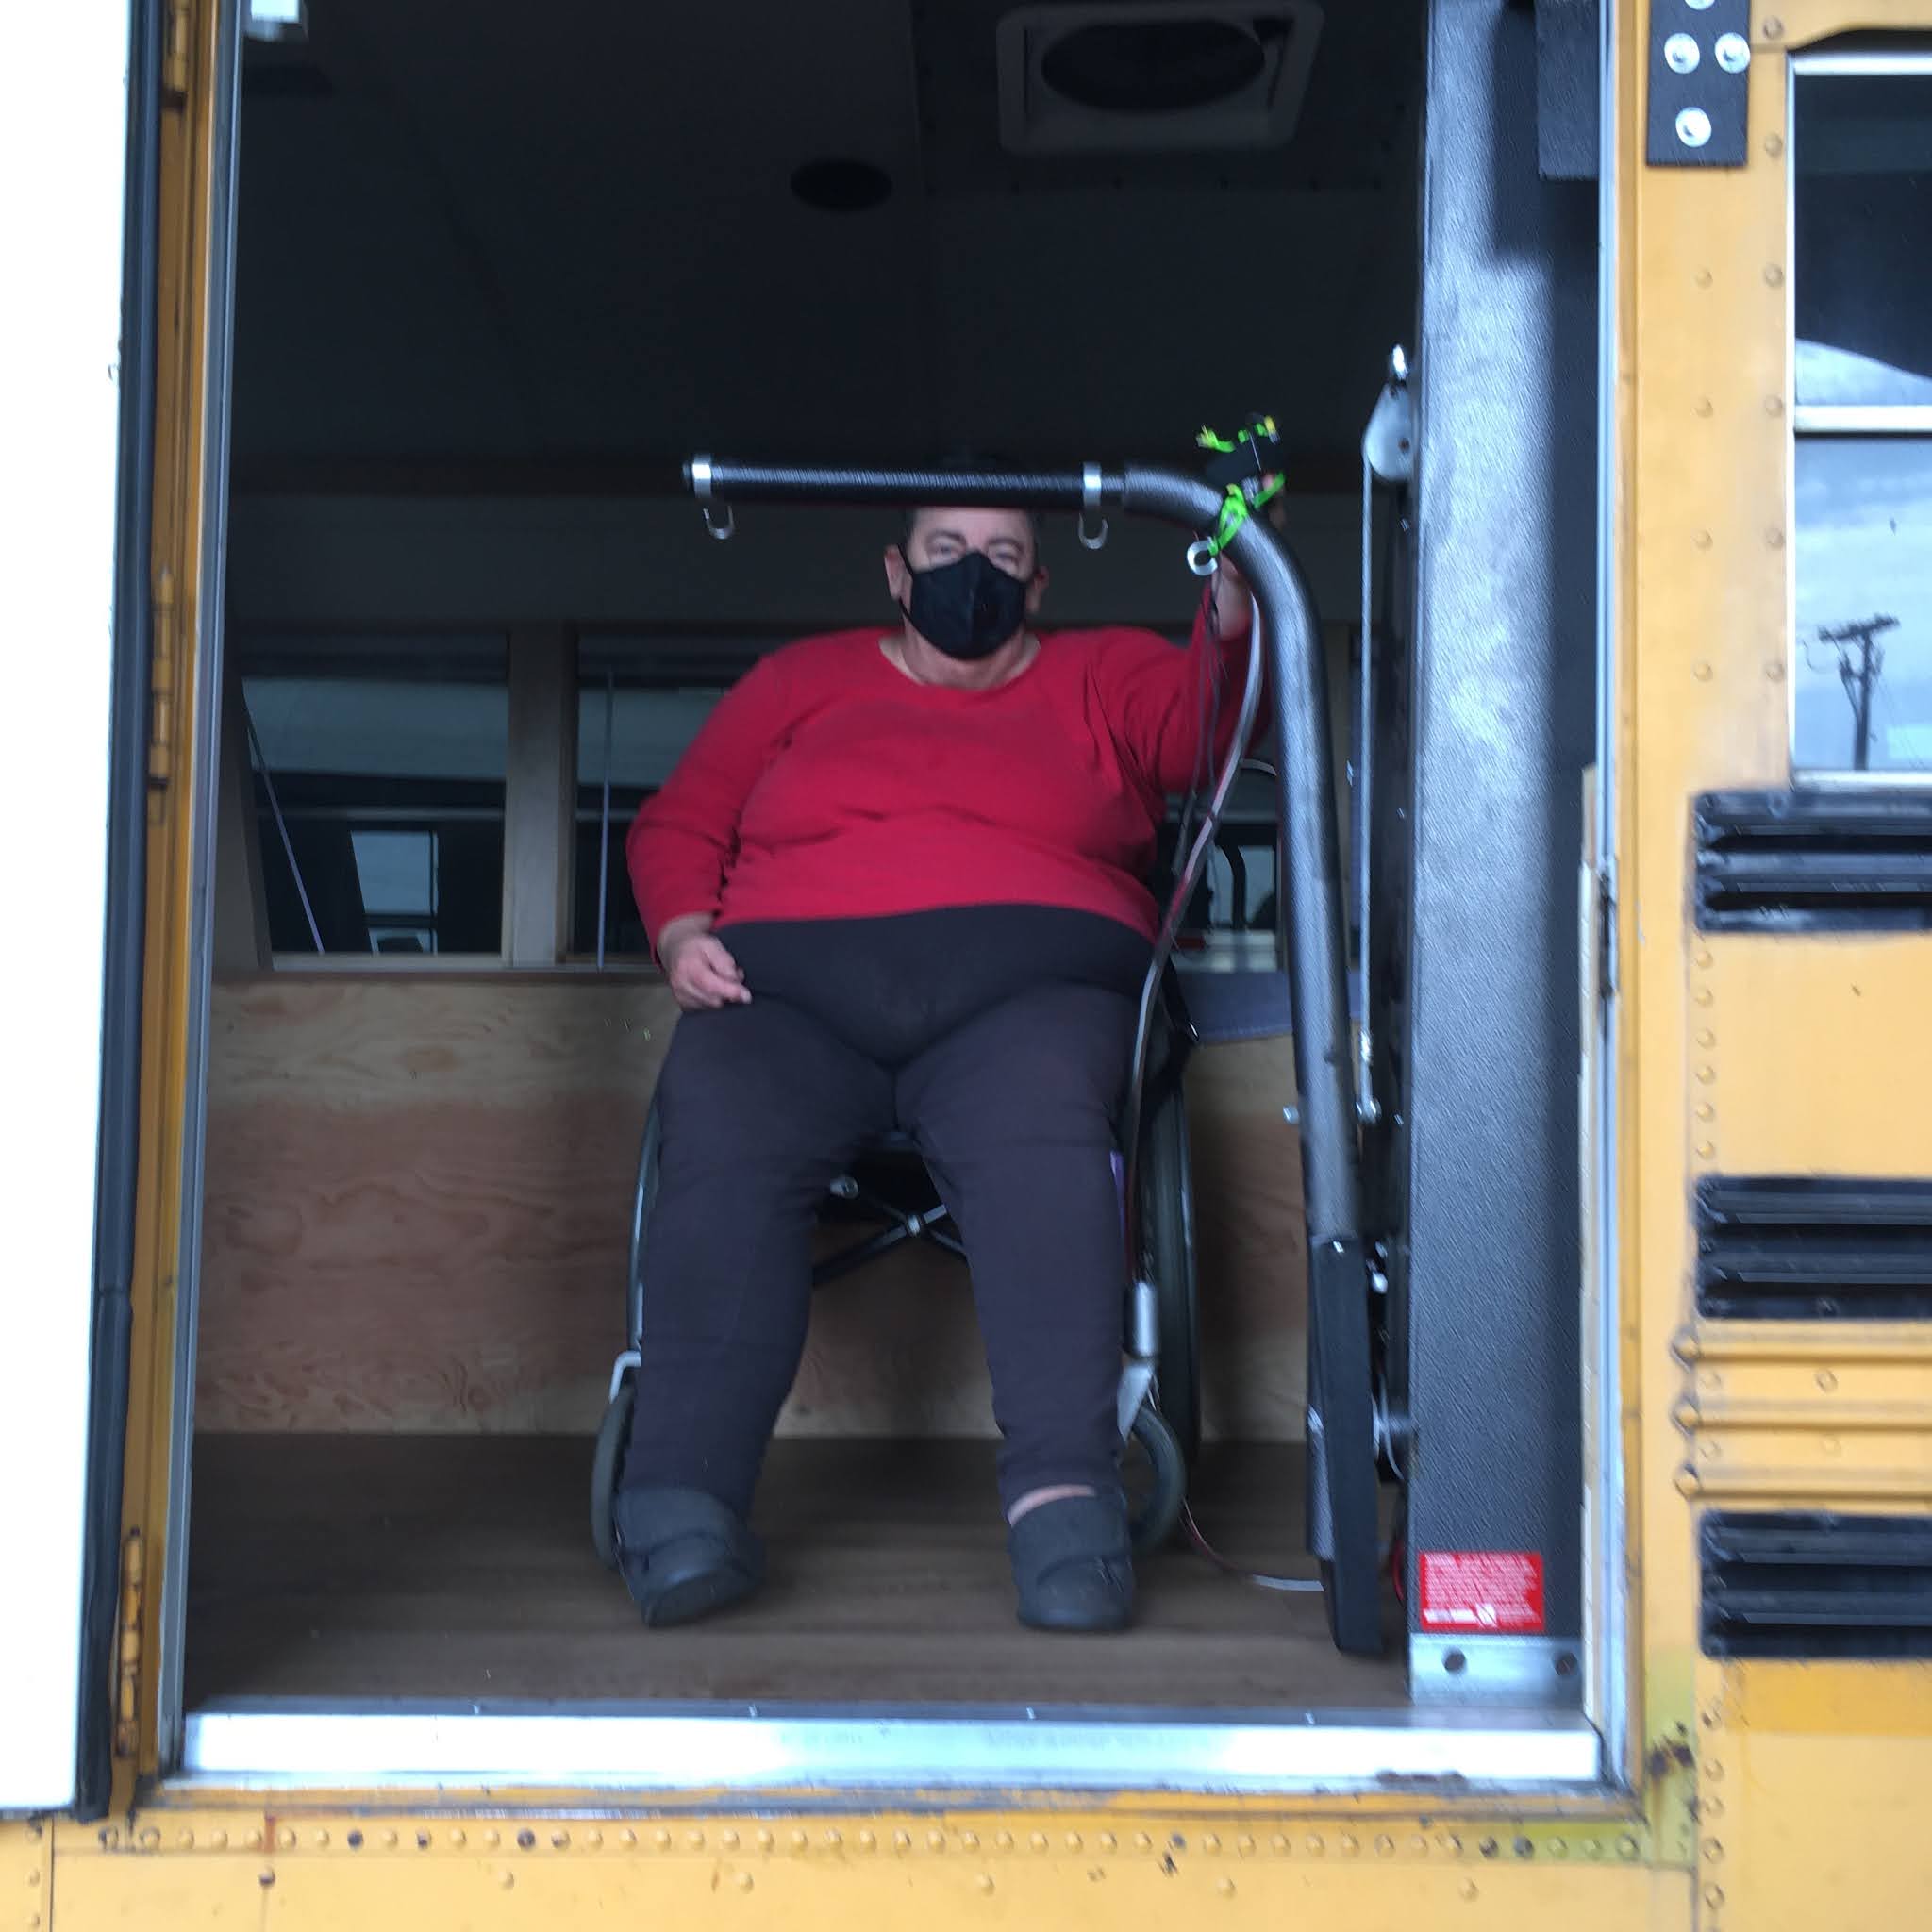
I LOVE the freedom of a lift that brings me right next to the bus. This means that I only need the same space as someone needs to open the front door and walk out of the bus. The joy of this freedom is exhilarating. No more searching for spaces where I have 6-8 feet for the lift to come down and I can get off. Many many times I couldn't put a lift onto the sidewalk because there was not enough room - even with small minivan ramps.
I also love that the lift takes up only a tiny footprint on the bus - that the door is usable even when the lift is inside the bus.
A few notes probably of interest to only a few folks. These photos were taken with my very old back up manual wheelchair. The one I use when I cannot use my power chair and someone (pre-covid) is driving me door-to-door. It doesn't have footplates because my disability has whole body weakness and I find using both my legs and my arms makes it easier for me to use a manual wheelchair. Obviously this doesn't work if I need to do anything more than move a very short distance.
Also I attached a thin rope to the controller. As I move "up" and "in" it's hard to hold onto the controller. I worry about dropping it and being stuck. So whenever I use the lift I tether it to the metal bar so that I can always retrieve it.
KITCHEN
I wanted a small kitchen where the only built-in is a sink. Using my home sink for comparison I knew that a 18" x 16" sink with a 6" depth is plenty big enough for me. I also want the flexibility of preparing non-cooking meal with a flat open counter area.
I decided to start with one induction cooktop (i.e. individual burner) with a second one as a back up. The induction burner will be pulled out of the drawer as I need it. Luckily IKEA's highly rated one was on half-price sale just when I was buying.
I looked at small ovens. I love my convection/microwave. But decided that it takes up too much space and the weight means I cannot move it around. I expected the toaster ovens to be a possibility but at an average of 25 lbs I rejected that option.
The kitchen countertop is 29" high, 4' long and 2' deep. The sink is 6" deep so that I can fit my legs under it. It has an upside "U" design so that I can have individual cabinet storage underneath.
After many conversations with the bus conversion folks, I couldn't figure out where to put the chest-style fridge/freezer. Right now the dual zone (separate fridge/freezer controls) Dometic DZ75 takes up the entire knee space under the kitchen counter. I am not happy with it but couldn't figure out a better option during the conversion. To make things a bit more challenging, I cannot use the slides under it because it seems to require someone strong with a wide arm span who can lift and pull at the same time. Since it has to be pulled out fully to open the top, I need to find a workable, if temporary, solution in the next few weeks.

In this configuration I can get to the sink but not use any of the counter. Not sure if my temporary solution will be to put some wood between the kitchen counter and work table and put better slides on the Dometic - or - move the Dometic and have a usable kitchen counter.
SEE PART 2 for more access features.
Wednesday, August 5, 2020
Want list - First peek
This is part 2 of a three part First Peek. Part 1 looked at what I needed in the bus design. Part 2 is what I wanted. Part 3 is about the access features.
WANTS
Building from scratch is a balance of what is needed (i.e. finished floor), what is wanted and how to make everything work for me (i.e. accessible to me).
I needed to have: a finished sealed interior; insulation in floor, walls and ceiling; hot & cold water with storage tanks; sink; toilet; bed; and desk.
DECISIONS, DECISIONS
Building is always a balance of what I dream, what is possible, what I can afford. For 2 years before the build I read a lot about what people love and hate in their moving homes. What they wish they had done and what they realized was something that sounded good but wasn't important to their mobile lifestyle. This blog post is about some of the choices I made.
This is going to be my hast home so I really focused on what's important for my comfort and lifestyle. I intentionally had the builders put in the structural basics I need but not do the finishing work. I want to select the colors, the interior storage and the style after I spend time inside Rolling Joy.

BED
I've never had a brand-new mattress. I decided since this is my last home, I want a really good mattress. After a lot of research I decided on a mattress that got top ratings for large bodied side sleepers like me. I almost bought a Sleep Number bed which also had a high rating. But a disabled friend bought one and told me that the edges of them are soft and she knew I needed a hard outside edge.
One of the most common complaints people have about beds in RVs is that they get moldy underneath. So I had the builders cut long slots into the plywood base to prevent a moisture buildup.
I built the queen size bed into the back of the bus. I plan on having a futon seat/bed up front for guests. I like the idea of separate spaces when I have visitors.

BATHTUB
People are often shocked to learn that I put a bathtub into the bus.

WASHING MACHINE
When people ask why I have a washing machine in a school bus conversion I reply: "I'm LOL. Leaky Old Lady." They rarely ask any more questions.
TEMPERATURE CONTROL
I hate being cold and I also hate air conditioning. So I put in 2 ceiling fans that can push or pull air; insulation in the ceiling, walls and floor; and a diesel heater with a blower fan. The bus windows are original - meaning the kind that are super hard to open and impossible for me to do. So opening doors will also be part of the temperature control system.

DESK
My goal is to park the bus under trees that are next to water. I plan to divide my time between making things with fabric - mostly quilted things - and - writing both fiction and nonfiction.
I need a large flat flexible space with adaptable storage underneath. Hence the Big Desk, an 8 foot long, 2 feet deep slab of maple butcher block.
STORAGE
I initially envisioned the space under the bed to be my main long-term storage area and the area under the Big Desk being my everyday storage area. But the space under the bed slowly got filled by the fresh water tank, then the power system, and finally by the diesel heater. (see Bed picture above)
I am pondering adding some external storage cabinets to the passenger side of the bus. Every first timer says they pared down their belongings to the bare bones basics and discovered they still had way too much stuff to fit into their RV. Especially because living in an RV requires purchases (and storage) that they didn't plan for like hoses and leveling blocks. The need for storage and where it goes will evolve as I move into the bus.
Subscribe to:
Posts (Atom)
-
ROLLING JOY 2.0 ONE YEAR ANNIVERSARY! Wow! Year in review: Parked the entire year in Chiefland, Florida. A small rural town where the onl...
-
All future blog posts are at the Rolling Joy tab at CorbettOToole dot com
-
 For some of us making the bed, specifically changing the sheets is impossible. I can pull everything off the mattress. But I cannot get it ...
