
For the last year I designed (and redesigned) Rolling Joy, my 30' school bus conversion. Sending it to the bus conversion folks meant I had to make some important access decisions from afar. I had to decide on the final layout, what types of systems I needed (solar? propane? shore power?) as well as where to put the electrical outlets and what kinds I needed (3 prong? USB?)
Because I use a wheelchair, I adapt and redesign every place I live. Rolling Joy provided the challenge of having to plan more carefully because in a space that's 25' long and 7.5' wide every decision is critical and in many cases permanent. I can't move the bathtub or toilet or bed later.
In this 2 part blog on Access Features I take you through some of the reasons for the decisions I made.
One of the best pieces of advice I received on doing a custom build: "Figure out what's really important to you and then make those the priorities."
My priorities: a queen size bed with handrails; a series of eye bolts on the bed frame so I can change the bed without climbing on it; a kitchen counter with a built-in sink; a large table with clearance underneath; a soaking bathtub; a washing machine; two ceiling fans; a lift that drops me right next to the bus; a driver's seat on a rail to move back and swivel; under-the-bus locked storage cabinets; and enough solar and batteries to live off-grid for a few weeks at a time.
All of these require careful access considerations. What is the usable height of the bed? of the toilet? Where to put the electrical outlets? the important monitors (for solar/ water/ fuses)? How to get in / out of a deep bathtub? So many questions. So few options.
By and large I made up the solutions based on what I know works for me and what I hope will work in a bus. After 2 years of research I only found a handful of wheelchair users who travel in an RV or skoolie (adapted school bus) independently. Nearly all wheelchair users travel with a nondisabled person. Based on their blogs and articles the nondisabled person does a lot of tasks that I will be doing myself.
In Access Features Part 1 I discuss the lift to get me into the bus and how I designed the kitchen area. Part 2 focuses on the Work Table, Soaking Bath Tub, in-bus lift, and toilet.
Just for easy reference I am putting the layout here along with a front-to-back view of the inside:


ACCESS ESSENTIALS
LIFT
The floor of the bus is nearly 48" above the ground. The bus came with a working industrial Braun lift. The conversion folks removed it (chopped it into pieces) when they laid down the floor (a sad story for another time).
As I evaluated replacements I also looked closely at RV parking spaces in campgrounds. A school bus is 8.5' wide. The parking spaces (i.e. space available for the RV and getting in and out) are usually 10' wide. Just enough room for someone to open the door and step out of the RV. Definitely not made for any kind of platform lift (i.e. a lift where you roll out onto a platform) and there's rarely, if ever, any additional flat space next to the bus in a typical RV campsite.
I assessed if I could make any type of platform lift work. Typical platform lifts require 3-8 feet of drop space. Even if I cut off the lift side wall (a common disability hack), I'd still need 3- 4' because of the way that the lift pulls away from the bus as it drops.
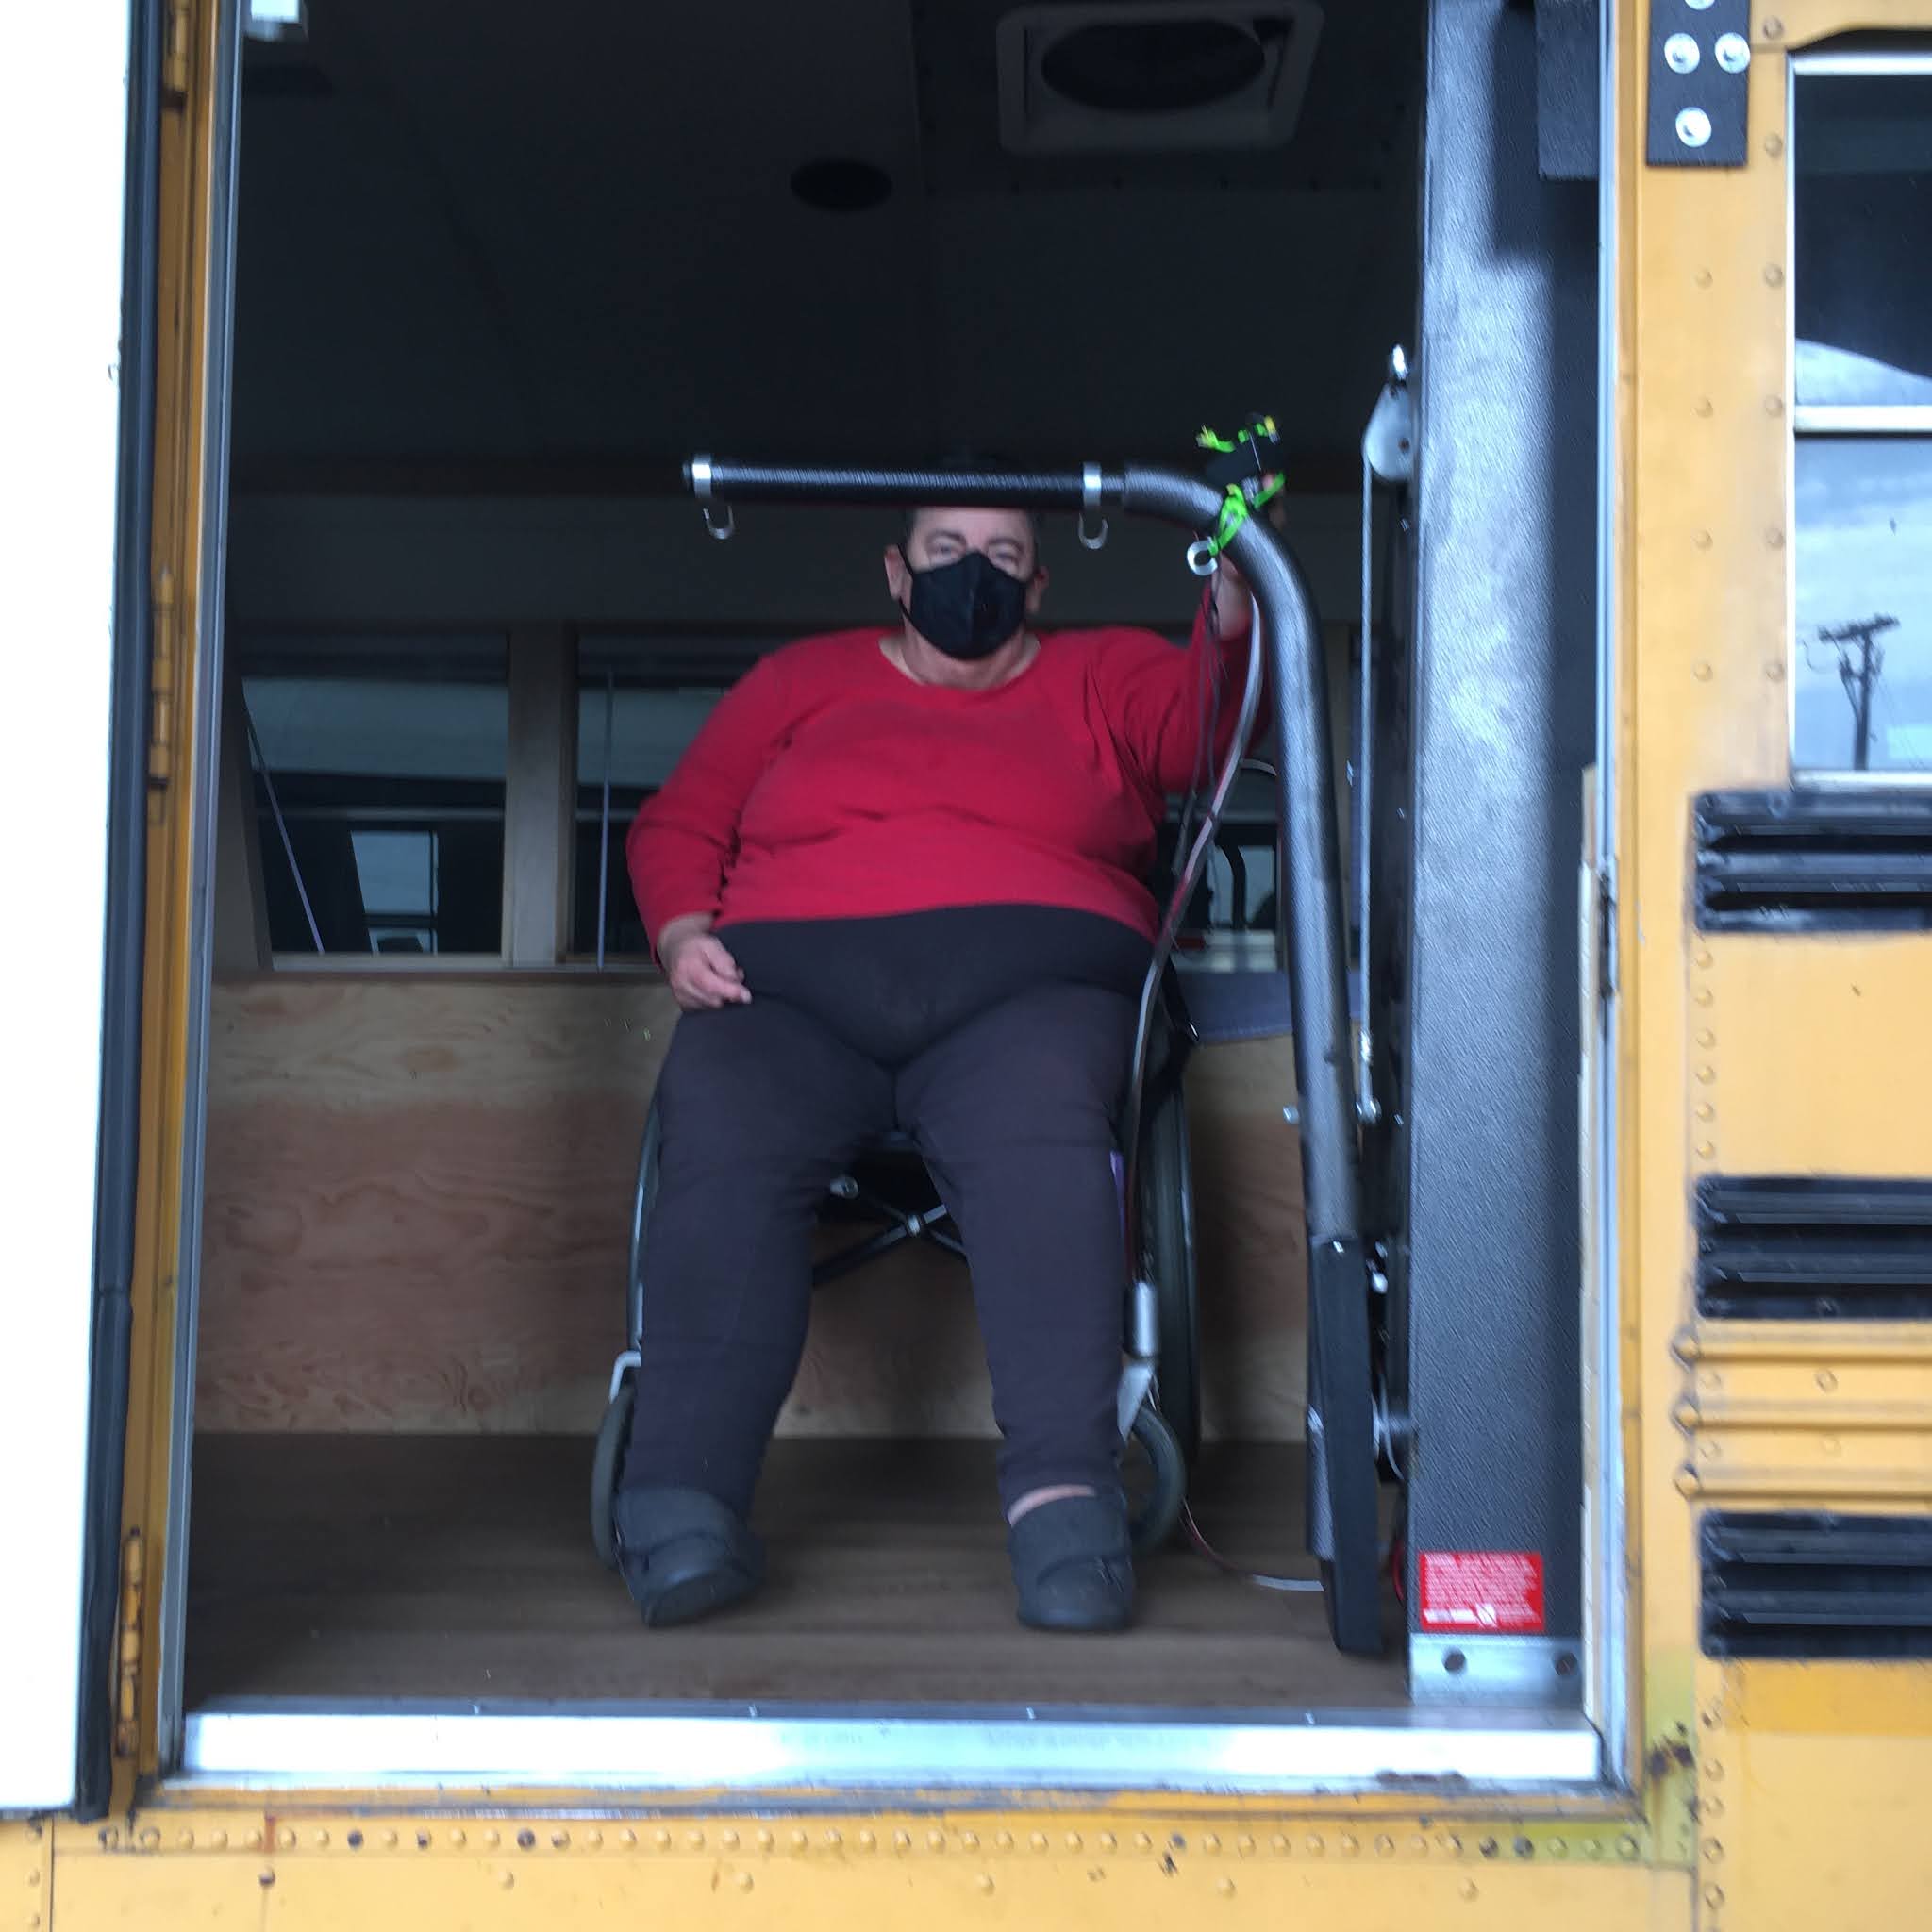
All this led me to look at Superarm lifts. Started by a wheelchair user, the Superarm is the ultimate bad ass lift. You are hanging your body with 1" straps attached to a single horizontal bar.
Yup, all that's between me and a 4 foot drop is 1" straps attached to a horizontal bar.
Take a deep breath because riding this lift feels as scary as the photos show. But I want to be clear, this is a safety-tested lift. I am safe as long as I follow their directions on how to attach the straps to my wheelchair and how to safely operate the lift. Superarms are reliable lifts and the owner (according to website photos) was also a large-bodied person. My fear comes from being a new user and the height I am traveling.
As the photos show I am still in the "I'm know I am going to die" phase of learning to trust the lift. But as I nail it, I will relish the freedom of a lift that positions me right next to the bus.
Here's how it works.
A tall motor mechanism is mounted on the right side of the door opening (right as looking from the outside). It has an "L" shaped metal arm. The long side connects from the motor mechanism. Ths short side has 2 hooks. There is also a wired controller with 2 toggle switches (up/down, in/out).
When I first got the lift, it came with 2 metal rings with two 1" strips of webbing on each ring. The device and straps are rated to safely lift 600 lbs. On each side I take the shorter strap and attach it to my wheelchair handle. The longer strap goes down to my wheelchair base frame. I adjusted them until I was comfortable when the lift rises.
I start by grabbing the controller (which I leave on the bus floor at the door opening when I am outside). I park my wheelchair with big wheels against the bus. The lift arm comes down in front of me. When it reaches the lowest point, I attach the 2 metal rings to the 2 hooks on the metal arm.

Then I lift myself a few inches off the ground. I am checking that the I can be lifted safely while I am still close to the ground. Once assured, then I bring the lift "up" about 2 feet from the ground.

The lift automatically stops when I reach the top of "up". Then I press "in" to pivot the long metal arm so while the short metal arm rotates keeping the hooks in a strong lifting position.

The "in" function is timed to move much more quickly than the "up" function. Once I am inside the bus, I am still a few inches off the floor so I press "down" to bring the wheelchair down to the floor of the bus.

After I am fully down, I disconnect the metal rings from the metal arm and press "out" to position the lift parallel to the door for storage. That keeps the lift out of my way when I am inside the bus.
I LOVE the freedom of a lift that brings me right next to the bus. This means that I only need the same space as someone needs to open the front door and walk out of the bus. The joy of this freedom is exhilarating. No more searching for spaces where I have 6-8 feet for the lift to come down and I can get off. Many many times I couldn't put a lift onto the sidewalk because there was not enough room - even with small minivan ramps.
I also love that the lift takes up only a tiny footprint on the bus - that the door is usable even when the lift is inside the bus.
A few notes probably of interest to only a few folks. These photos were taken with my very old back up manual wheelchair. The one I use when I cannot use my power chair and someone (pre-covid) is driving me door-to-door. It doesn't have footplates because my disability has whole body weakness and I find using both my legs and my arms makes it easier for me to use a manual wheelchair. Obviously this doesn't work if I need to do anything more than move a very short distance.
Also I attached a thin rope to the controller. As I move "up" and "in" it's hard to hold onto the controller. I worry about dropping it and being stuck. So whenever I use the lift I tether it to the metal bar so that I can always retrieve it.
KITCHEN
I wanted a small kitchen where the only built-in is a sink. Using my home sink for comparison I knew that a 18" x 16" sink with a 6" depth is plenty big enough for me. I also want the flexibility of preparing non-cooking meal with a flat open counter area.
I decided to start with one induction cooktop (i.e. individual burner) with a second one as a back up. The induction burner will be pulled out of the drawer as I need it. Luckily IKEA's highly rated one was on half-price sale just when I was buying.
I looked at small ovens. I love my convection/microwave. But decided that it takes up too much space and the weight means I cannot move it around. I expected the toaster ovens to be a possibility but at an average of 25 lbs I rejected that option.
The kitchen countertop is 29" high, 4' long and 2' deep. The sink is 6" deep so that I can fit my legs under it. It has an upside "U" design so that I can have individual cabinet storage underneath.
After many conversations with the bus conversion folks, I couldn't figure out where to put the chest-style fridge/freezer. Right now the dual zone (separate fridge/freezer controls) Dometic DZ75 takes up the entire knee space under the kitchen counter. I am not happy with it but couldn't figure out a better option during the conversion. To make things a bit more challenging, I cannot use the slides under it because it seems to require someone strong with a wide arm span who can lift and pull at the same time. Since it has to be pulled out fully to open the top, I need to find a workable, if temporary, solution in the next few weeks.

In this configuration I can get to the sink but not use any of the counter. Not sure if my temporary solution will be to put some wood between the kitchen counter and work table and put better slides on the Dometic - or - move the Dometic and have a usable kitchen counter.
SEE PART 2 for more access features.

